Command
mmail/crtmime
helps you in creating a MIME file and optionally in sending it.
The MIME file is saved as IFS file in path /mmail/mime.
The MIME file is without any MIME Send an distribution headers.
This allows the user to send a given MIME file several times to
different recipients.
This page illustrates through an example the creation and the
sending of a MIME file.
In this example, I want to create a MIME file made of:
- a mail-message body containing some text
- an attachment containing a photo
- an attachment containing a spool file converted to PDF.
Note 1. You must be very carefull when creating a MIME file.
Once an action is accomplished, you cannot change it.
The only way out is to press F3 or F23 (if displayed))
and restart from the beginning.
1. Preliminary steps
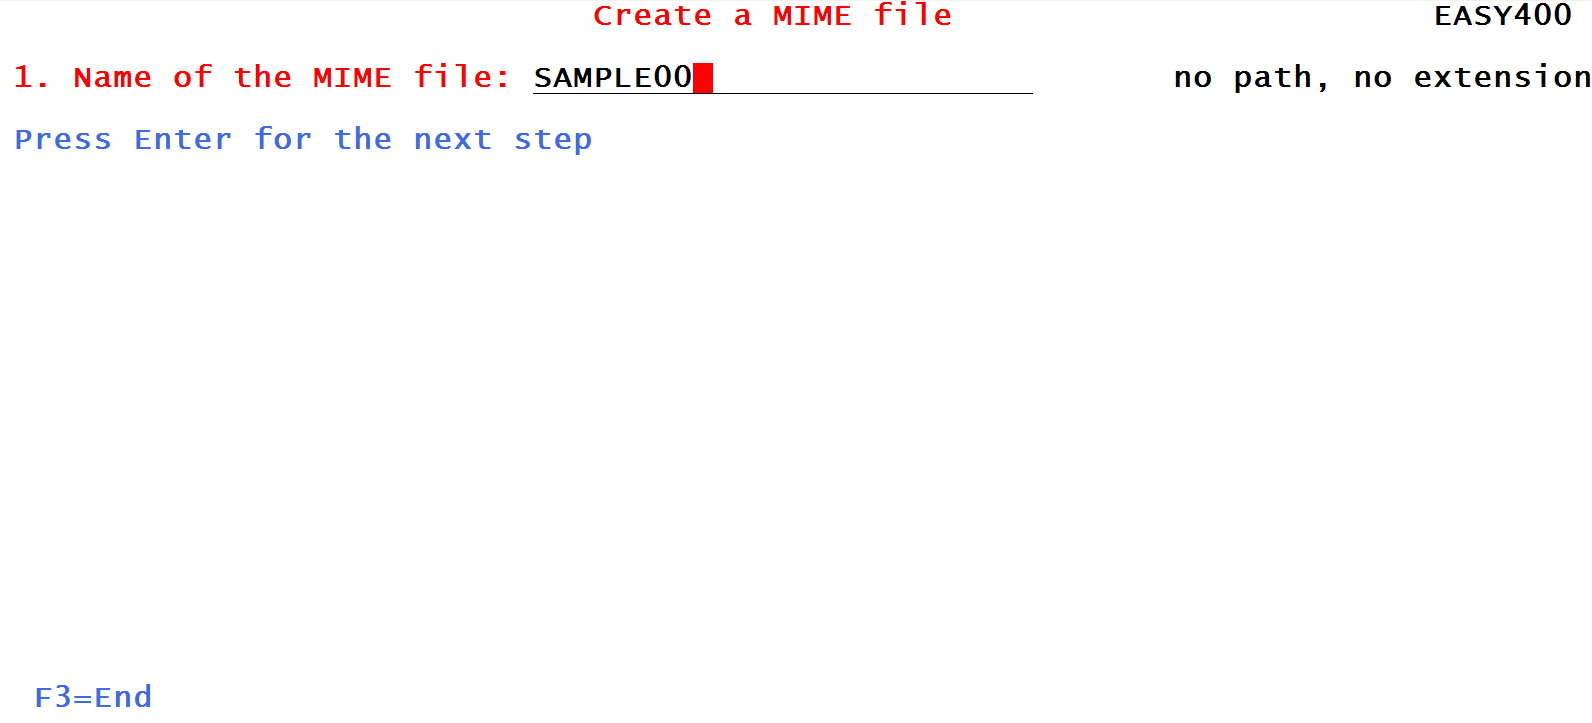
The first screen sent by command
mmail/crtmime
asks you to give a name to your MIME file.
Please be sure to:
- NOT specify the path, NOT specify the extension.
They will both be generated by the utility
- type a file name that does not yet exist.
If you type the name of a MIME file that already exists,
the file will be cleared and overwritten.
Figure 1- Naming the MIME file
Note that the file was assigned path /mmail/mime
and extension .txt
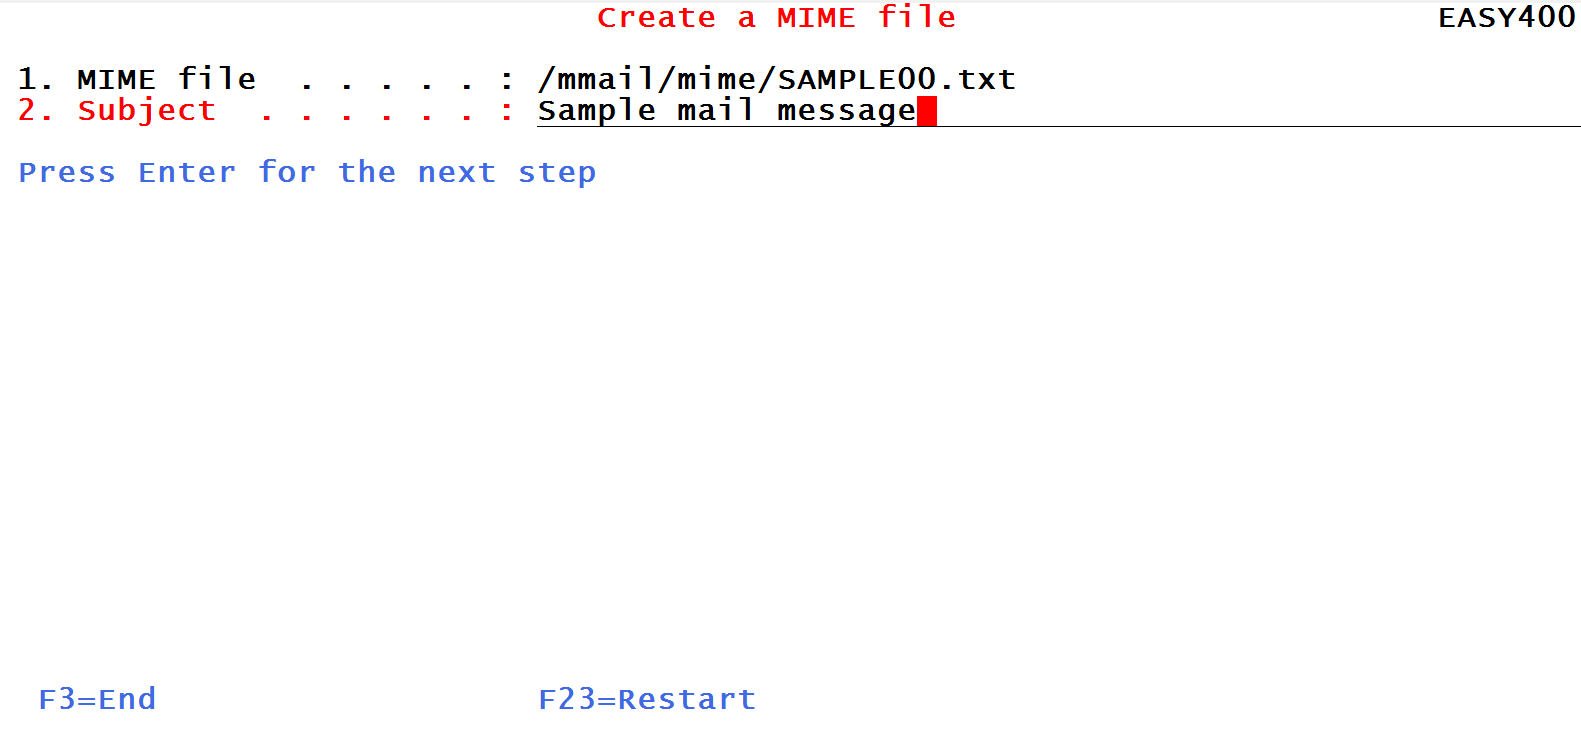
Now it is the time of typing the Subject of the mail-message:
Figure 2- Typing the Subject
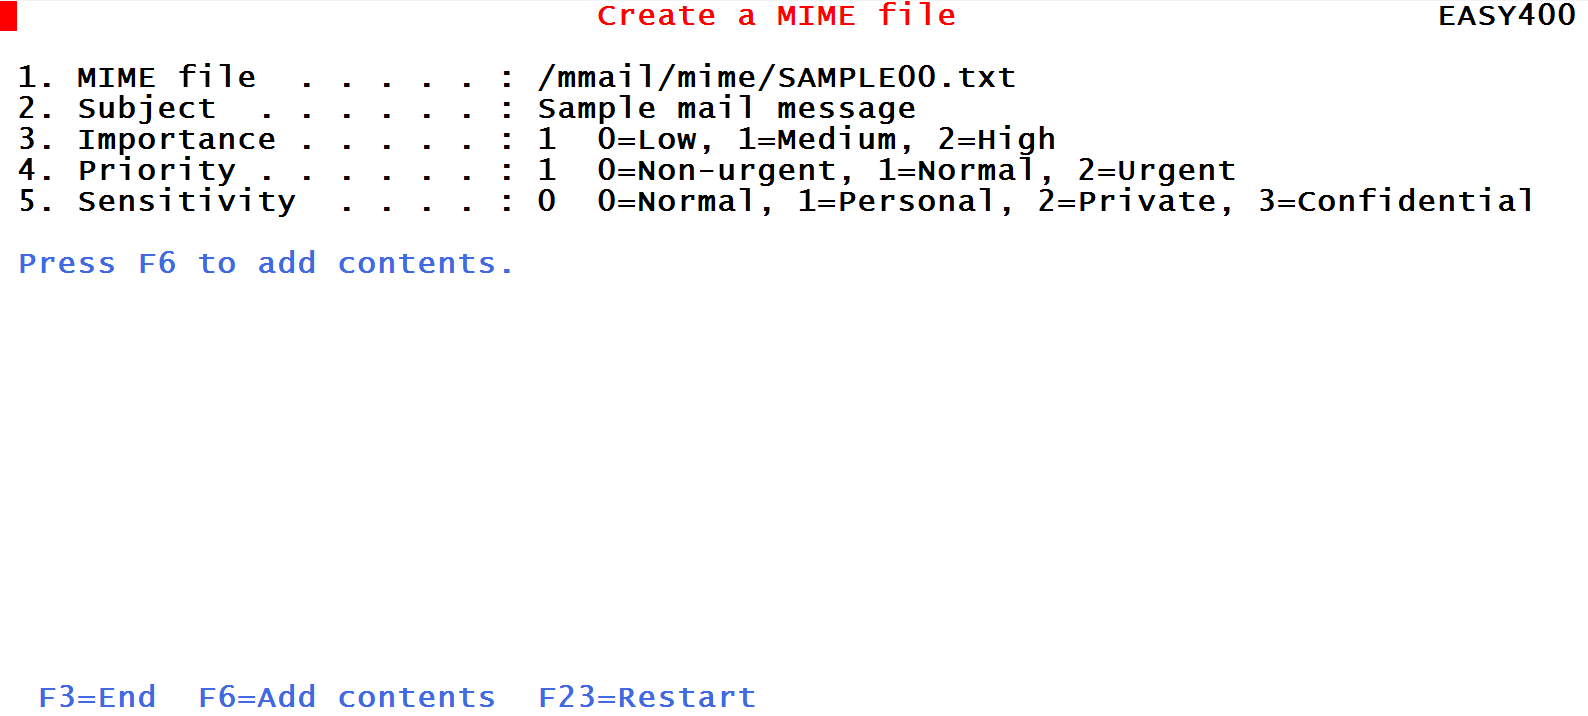
the next three steps (we skip those obvious Figures) allow
to assign the
- Importance
- Priority and
- Sensitivity
of the mail-message. Please note that sensitivity private does not
allow the recipient(s) of the mail-message to either print or forward it.
After this, you receive the following screen:
Figure 3- Time to define the contents of the mail-message.
2.Embedding some text
The first thing you have to do when creating a mail-message file is to embed some text to make up the so called "body" of the mail-message.
This is how you do it.
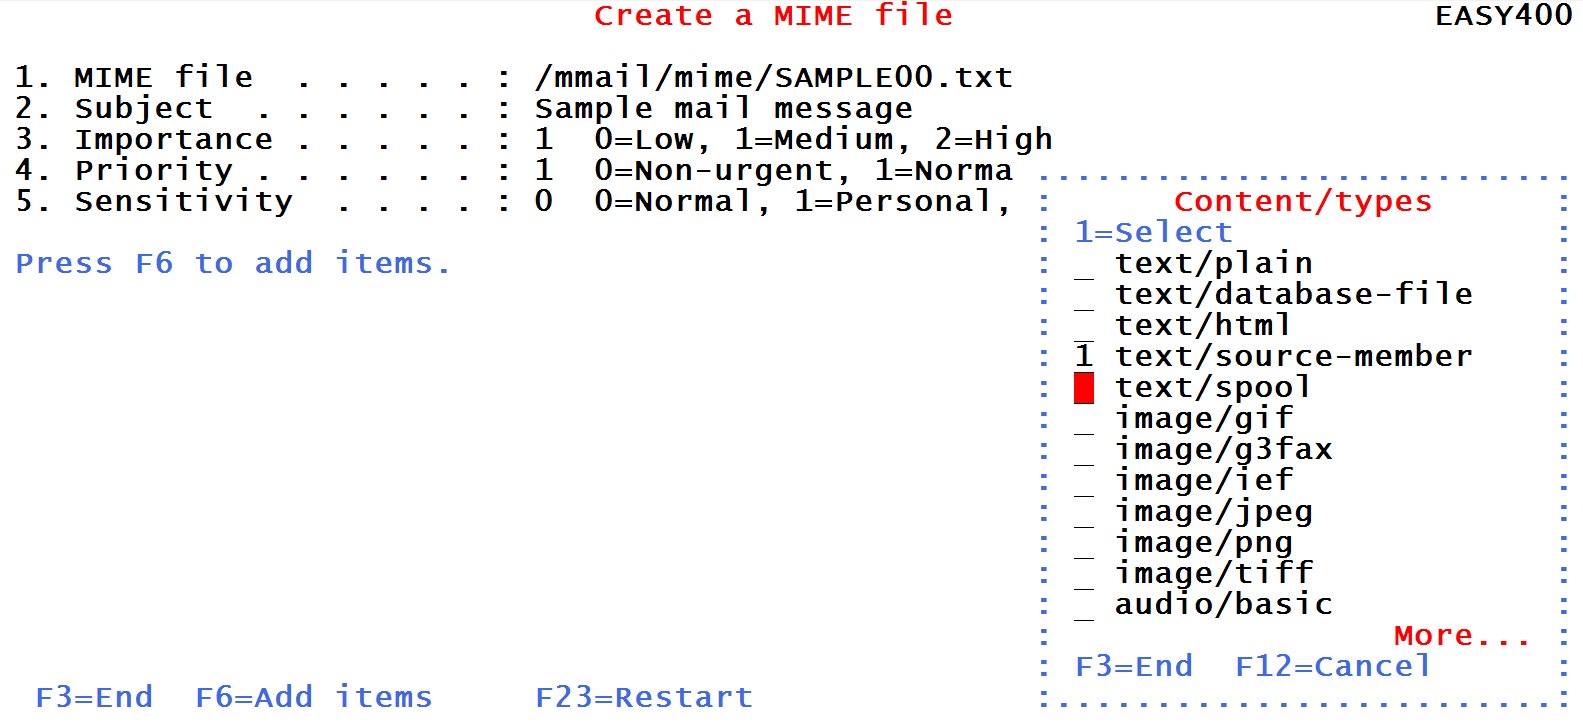
Press F6 to display the available Content-types:
Figure 4- Selecting the content-type for the body of a mail-message
You have several options to source the text for the mail-message body:
- Text/plain to pick up the text from an existing IFS stream file containing plain text
- Text/html to pick up the text from an existing stream file containing an HTML script
- Text/source-member to pick up the text from a member of an existing source file
Note that the other text options (text/database file and text/spool) should not be used for the mail-message body. They generate mail-message attachments.
In this example we suggest that you use Text/source member because that is a very easy way
for writing some text.
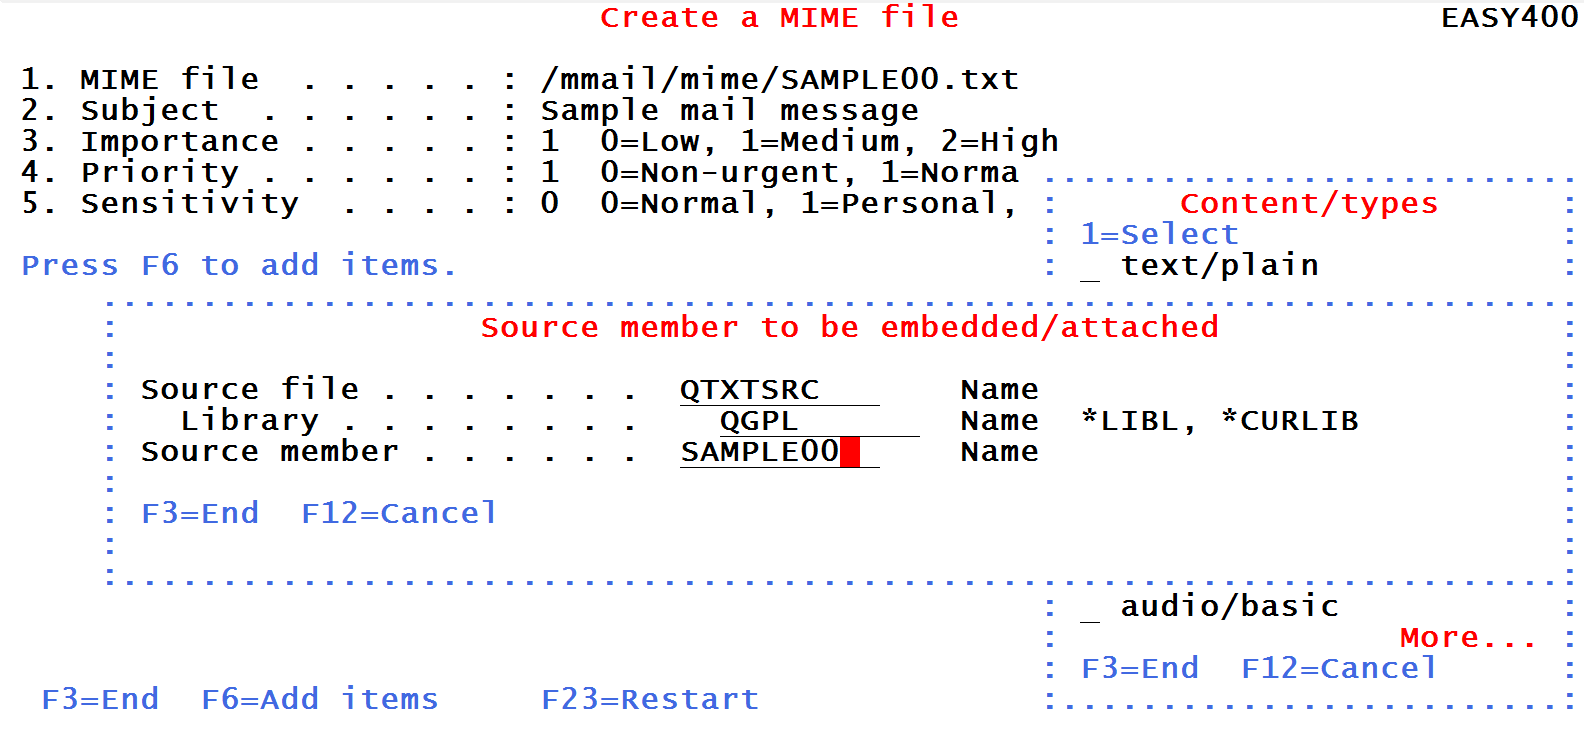
You will be requested to enter the name of an existing source file and the name of a member.
If the member does not yet exist, it is created.
Figure 5a- Specifying the source member to be used for the body of the mail-message
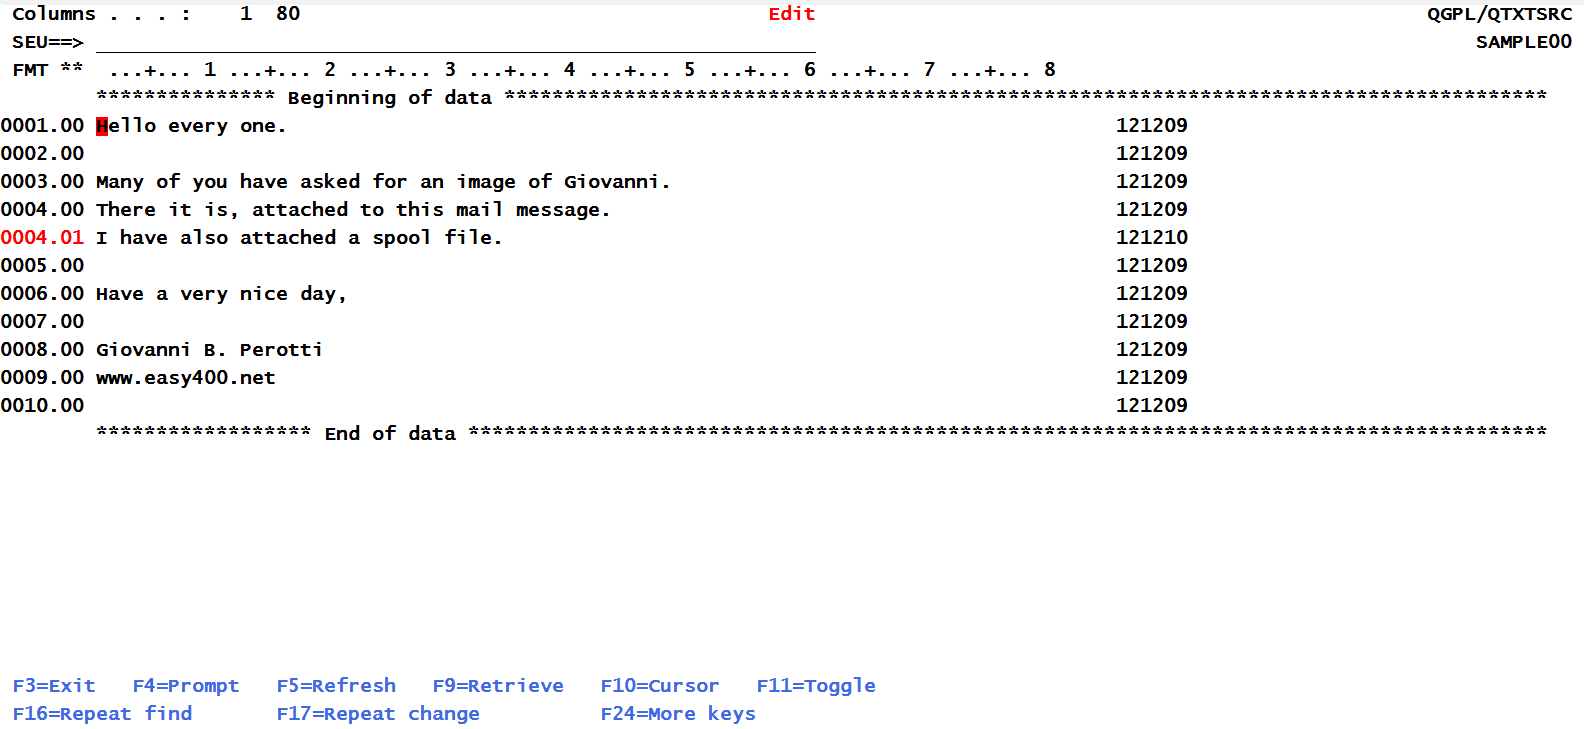
As soon as you press the Enter key, the source member is edited, so that you can type or update your text:
Figure 5b- Typing the text for the body of the mail-message
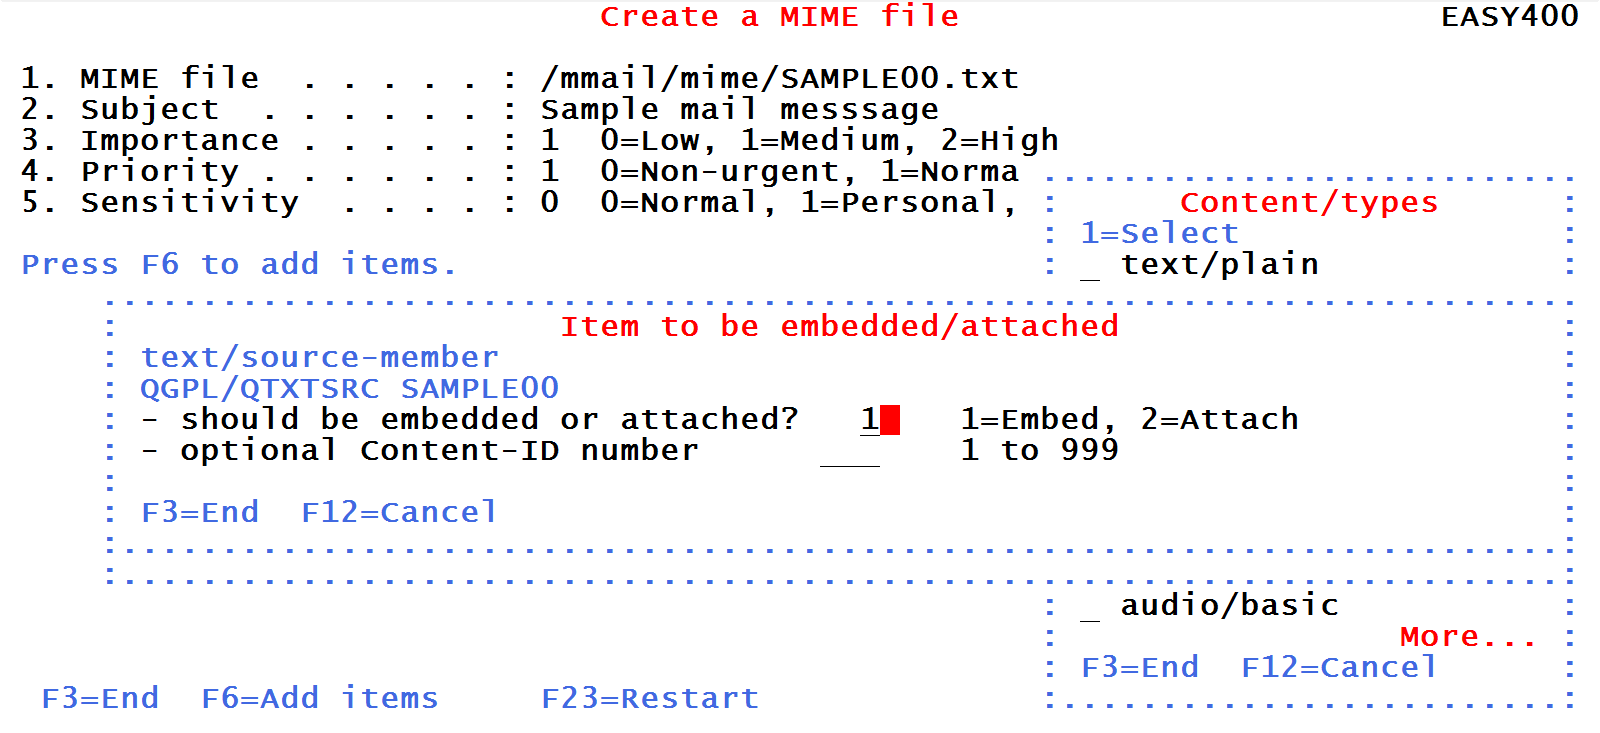
As soon as you end the editing, you are rerquested whether this text should be embedded or attached.
You sekect embedded because you want this to be the body of your mail-message:
Figure 5c- Request to embed the text
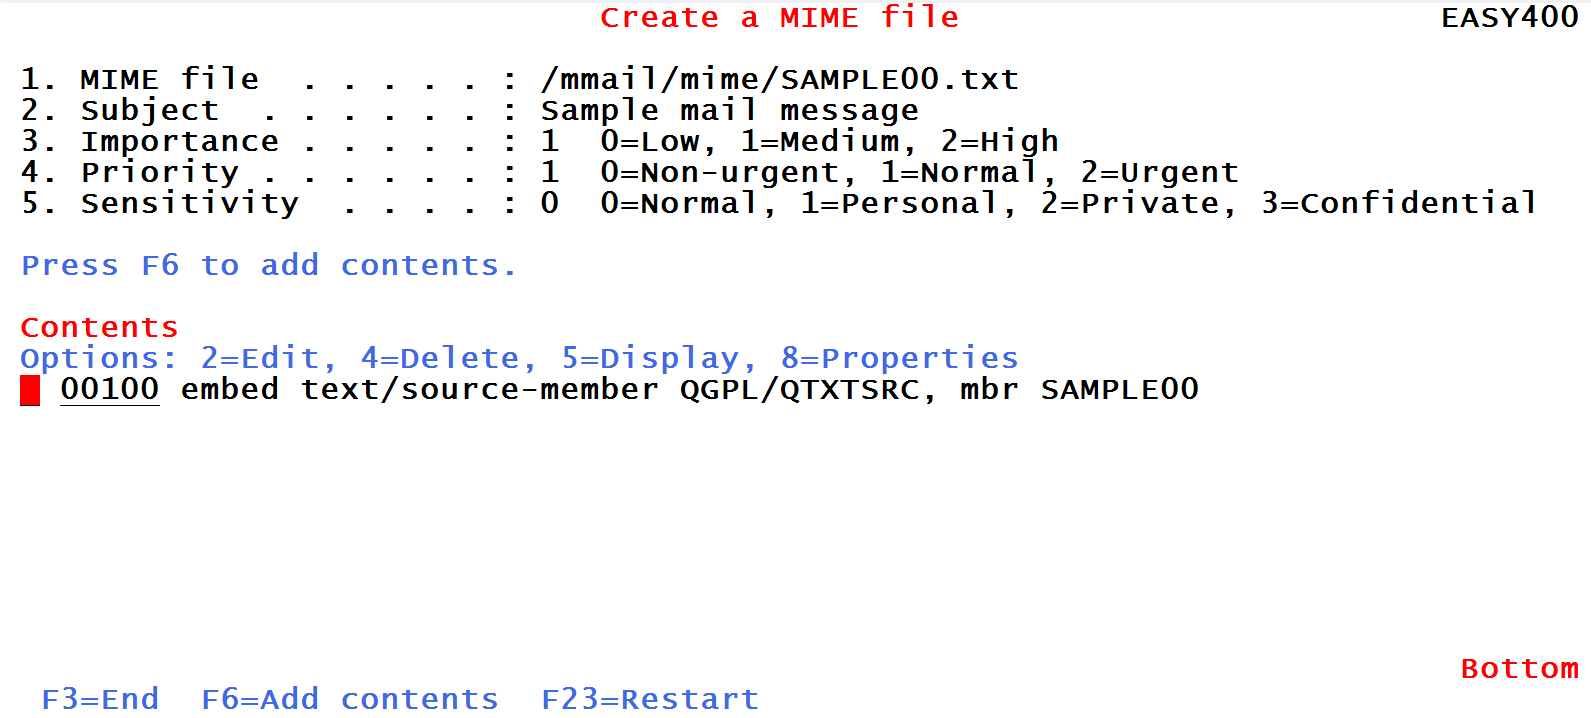
When you press the Enter key, you are displayed the contents of the messsage file so far:
Figure 5d- Contents of the mail-message file so far
3.Attaching an image
The following shows how you attach an image to the mail-message file.
Press F6 to select the content-type of the attachment and, as you want to attach a jpg image, select image/jpeg:
Figure 6a- Selecting the content-type of the item
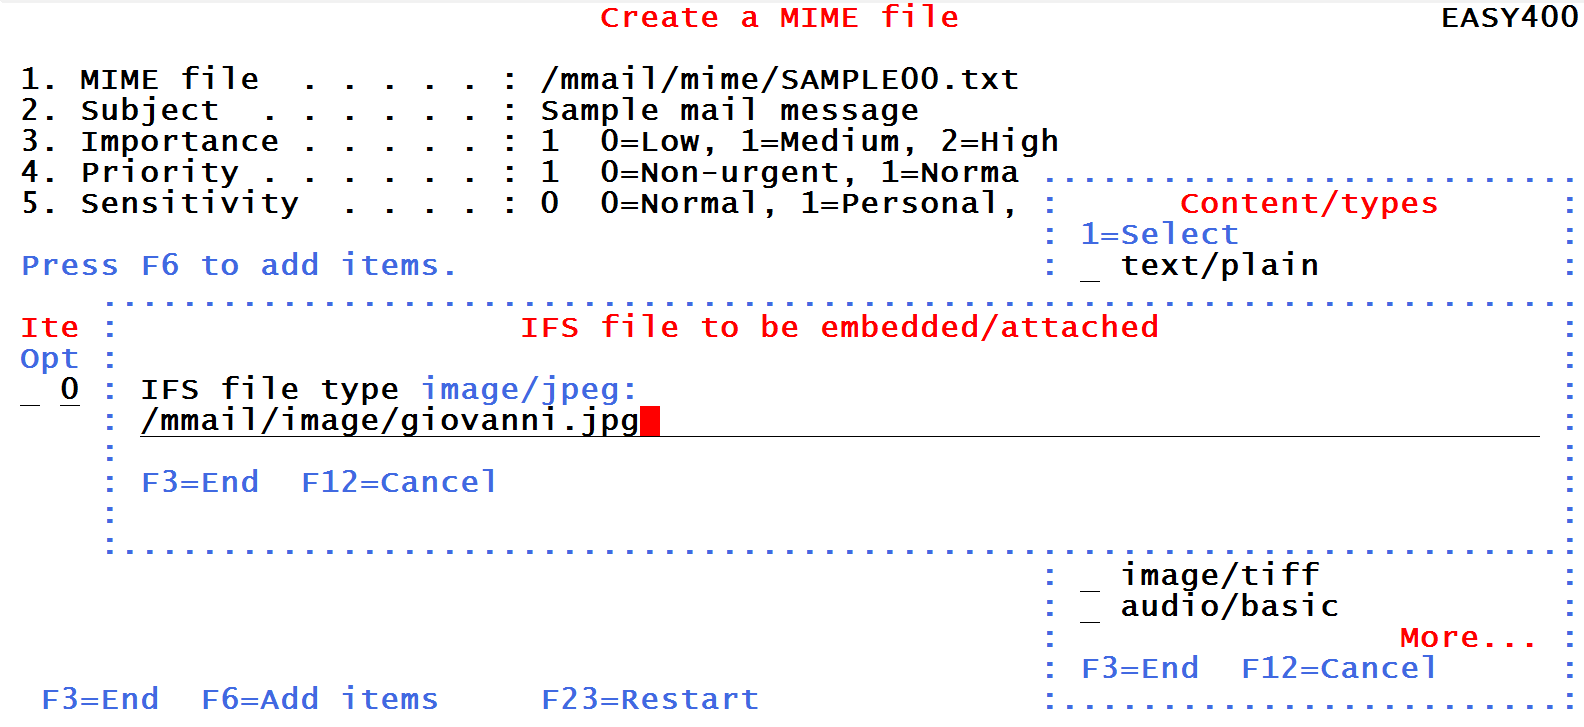
As soon as you press the Enter key you are requested to type path and name of existing IFS file
containing the item (the photo) to be attached:
Figure 6b- Name of the IFS file to be attached
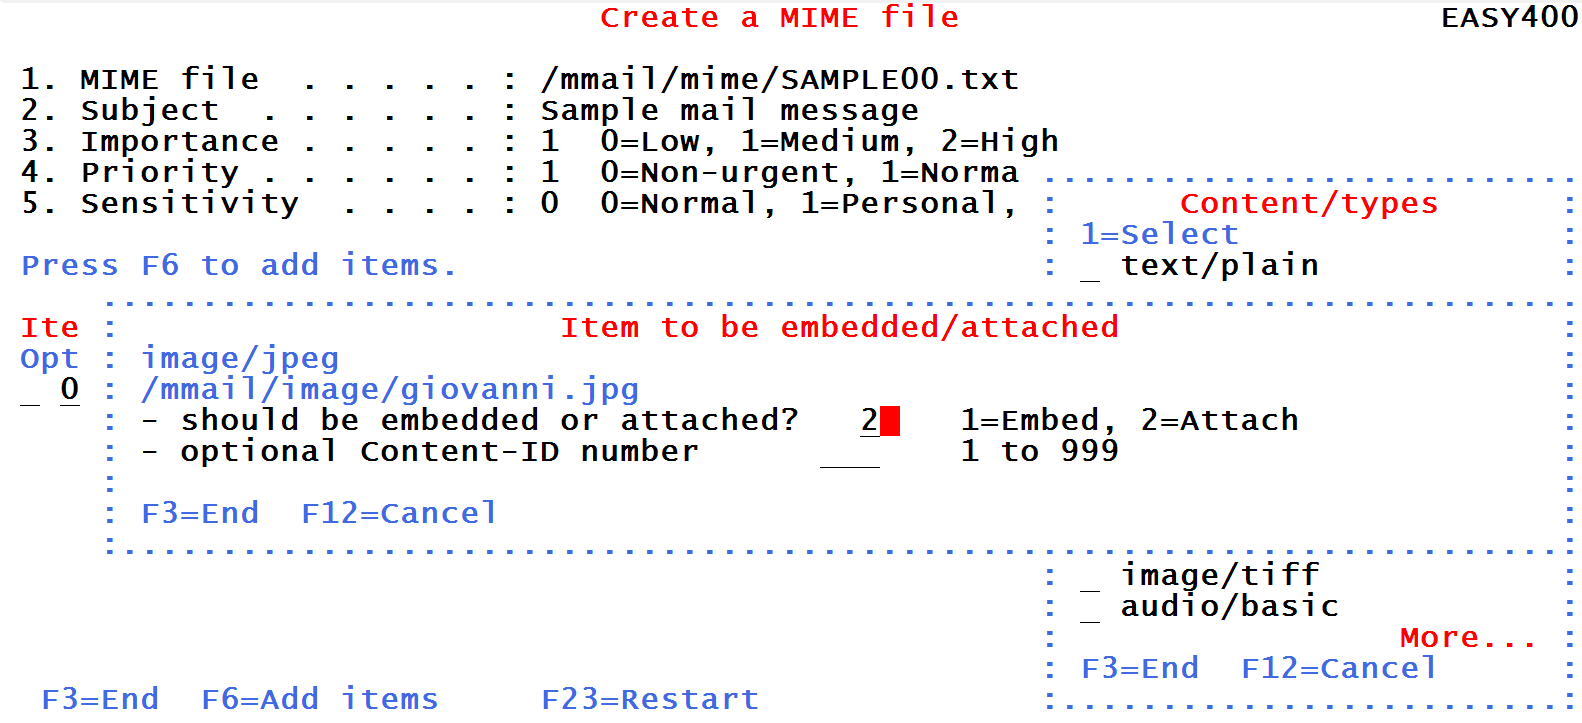
Last, you are requested whether you want to "embed" or "attach" this item.
You can just select "2=attach". In fact, the message body can contain just one item, and that was the text you just embedded.
Any subsequent item must be attached.
Figure 6c- Attaching the item
Worth to be noted that the image was physically copied into the MIME
file. Being a binary object, the image was copied in the BIN64 format
(a format where three EBCDIC bytes are transformed to 4 ASCII bytes)
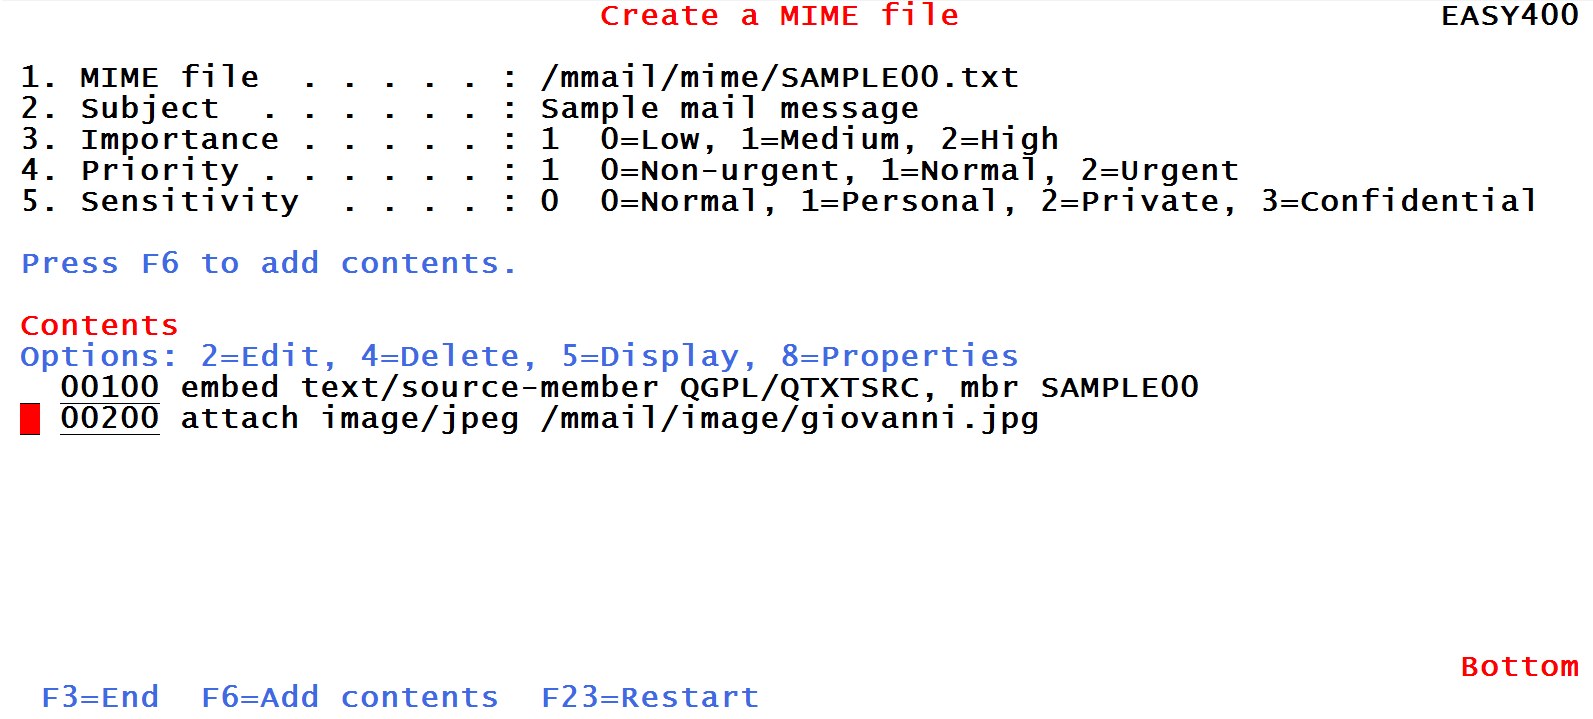
When you press the Enter key, you receive the following screen:
Figure 6d- Contents of the mail-message file so far
4.Attaching a spool file
Assume that the last spool file created from the current job was obtained through command DSPLIB QTEMP *PRINT,
that you want to convert it to PDF and attach it to this mail-message.
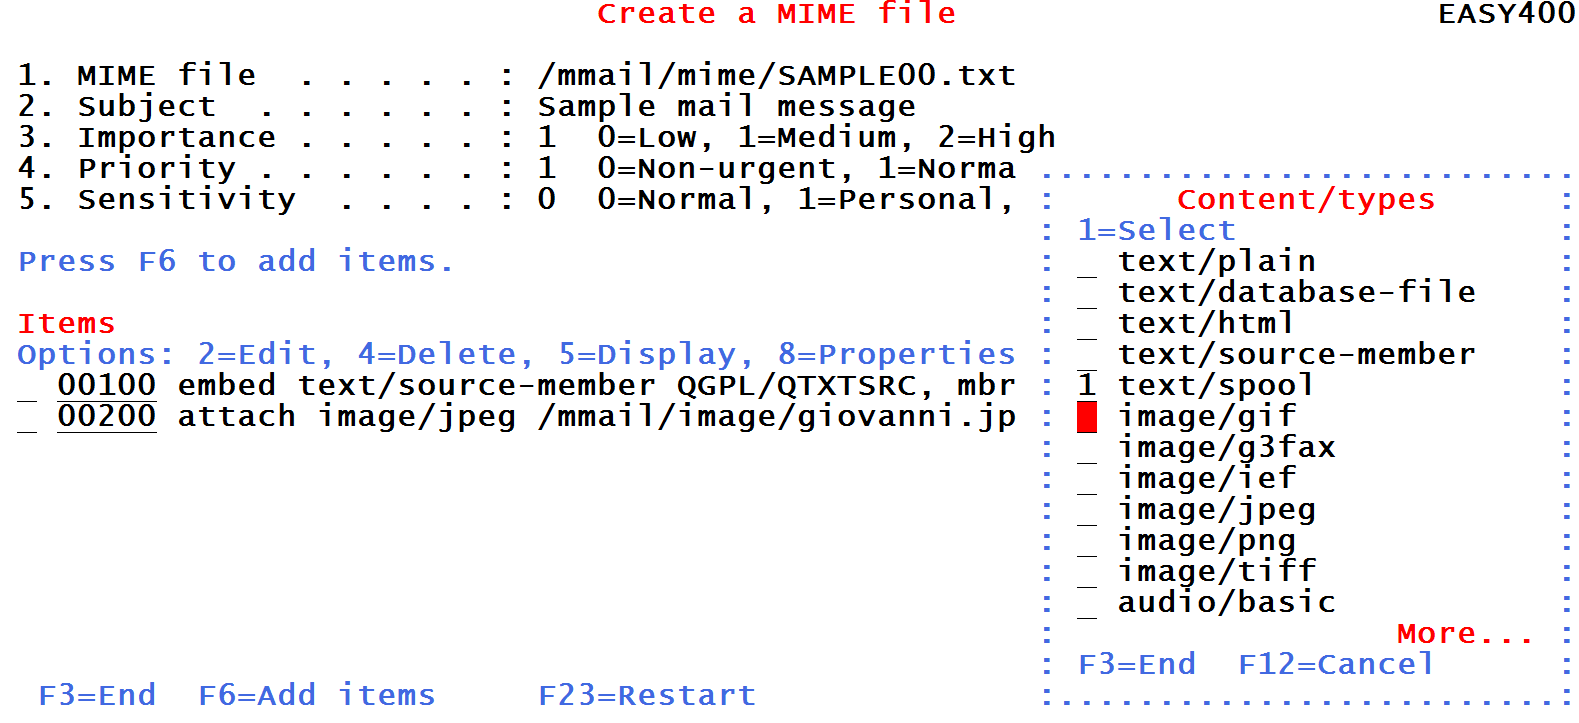
Press F6 to select the Content-type:
Figure 7a- For spooled files, select Content/type "text/spool"
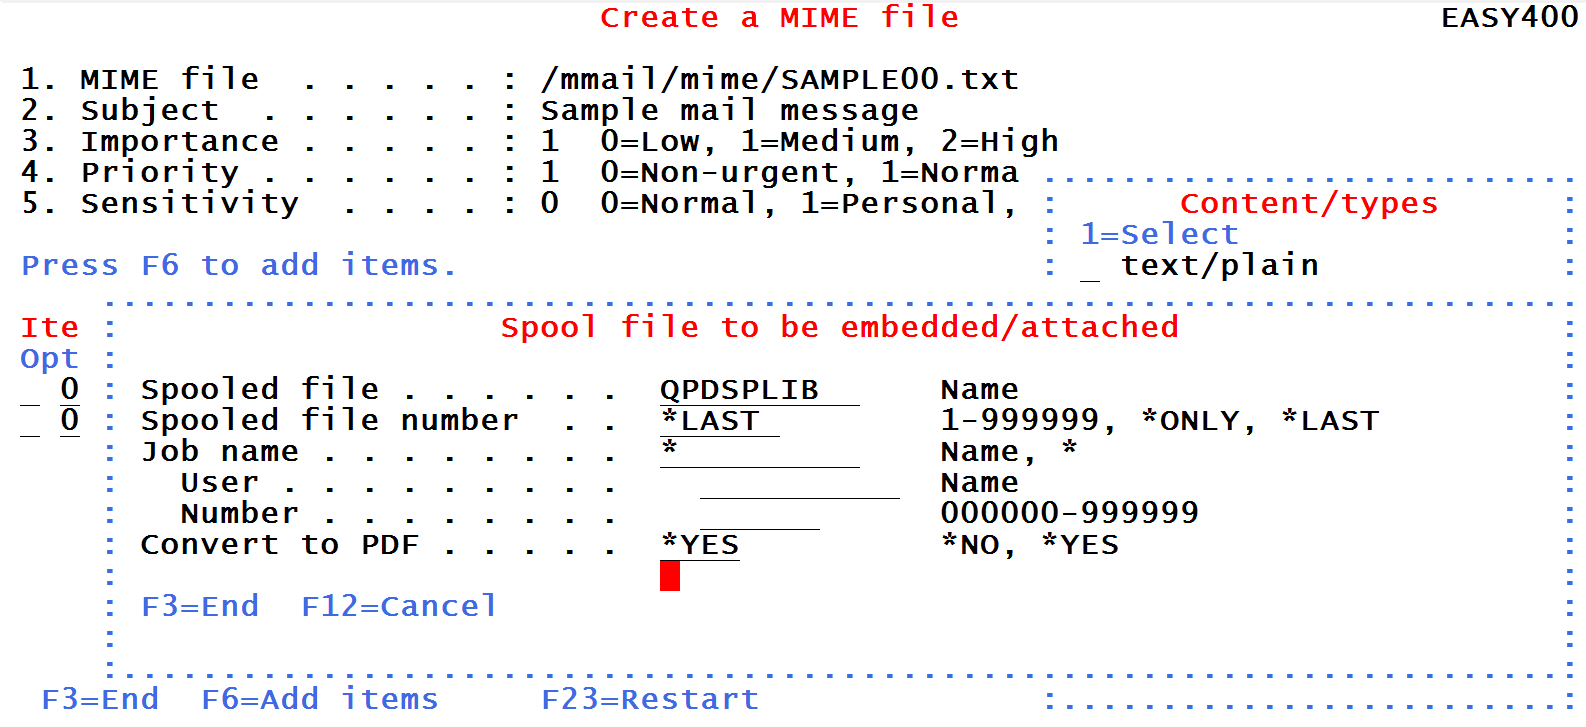
Then you have to identify the spool file to be attached and specify that you want it converted to PDF:
Figure 7b- Identify the spool file
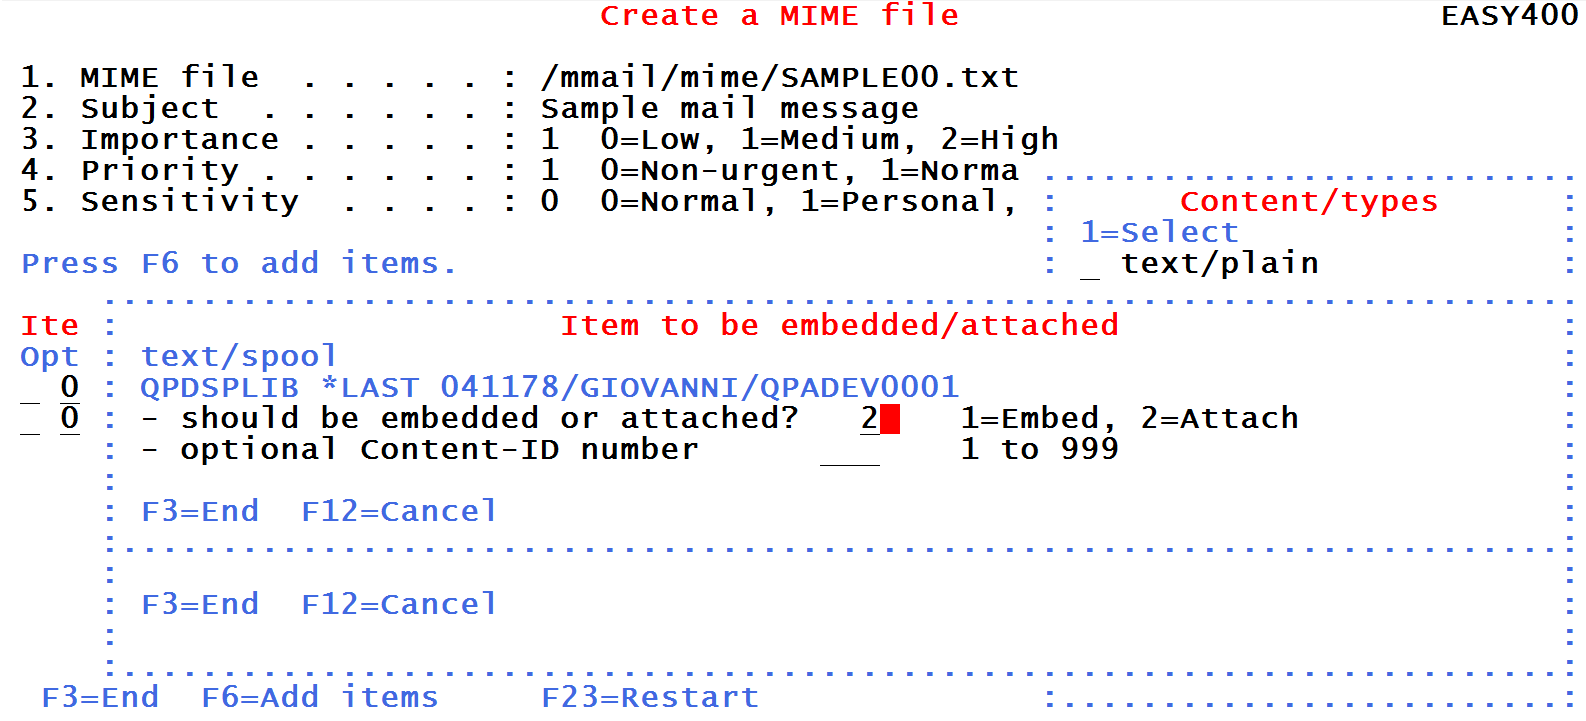
When you press the Enter key, you receive the following screen:
Figure 7c- Attaching the item
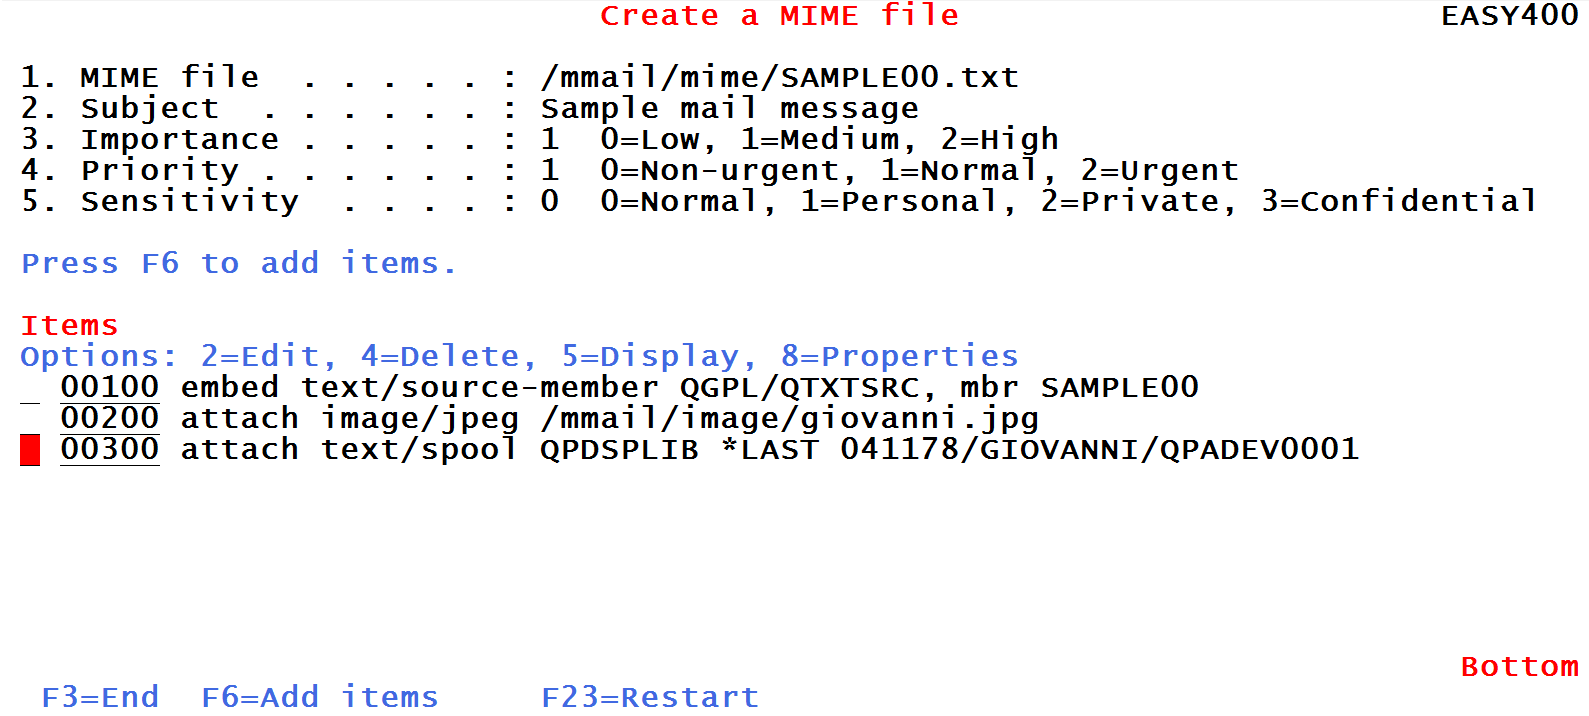
You then receive a screen documenting the three parts making up you mail-message:
Figure 7d- Final components of the mail-message
Of course, by choosing Content-type=other, the IFS save file
has been merged into the MIME file in BASE64 format.
The MIME file is now complete.
5.Saving the MIME file
At last you must save your mail message. The save operation actually builds the mail-message stream file with the stream file name mentioned in Figure 2.
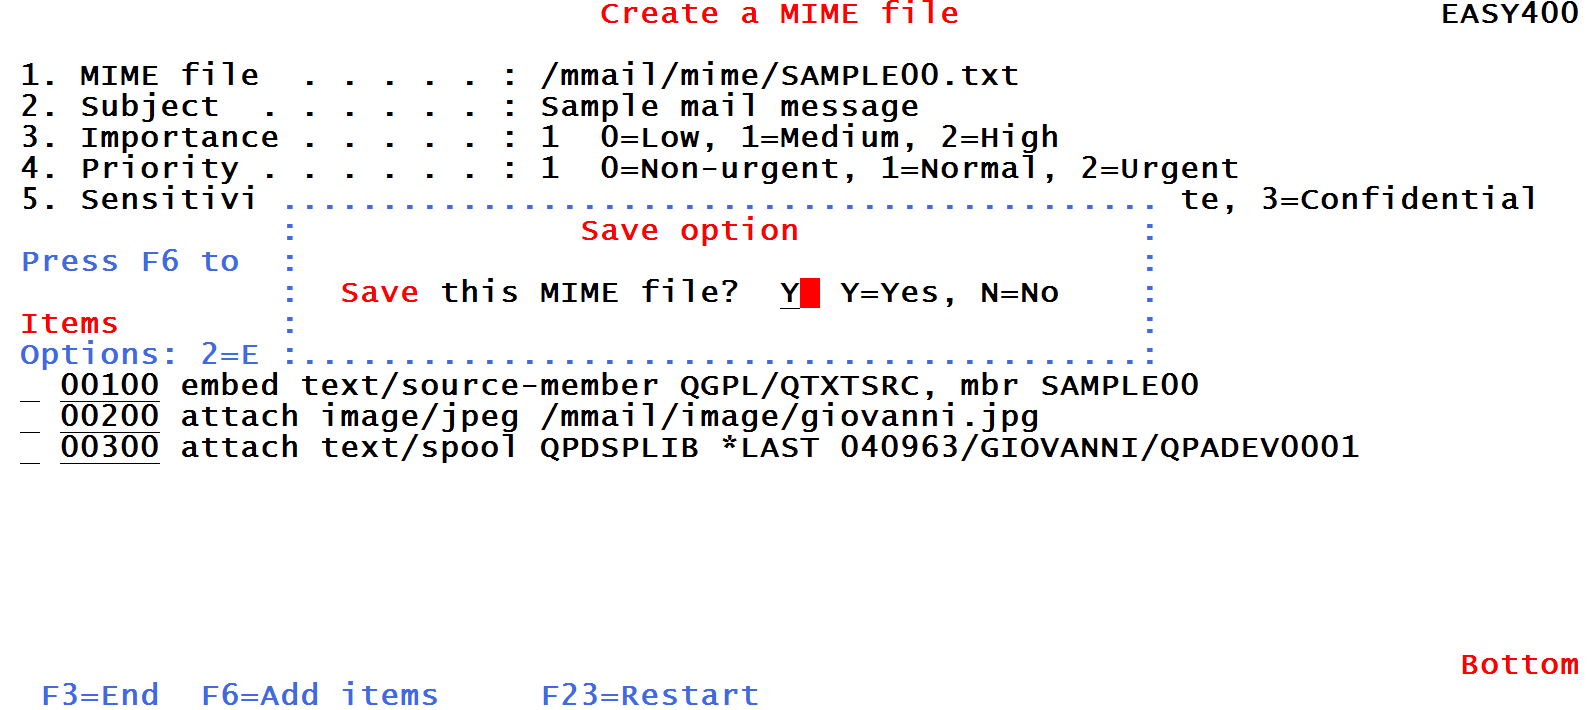
To perform this save, press F3. You receive the following screen:
Figure 8- Generating the mail-message stream file
Press this link to display the generated mail-message stream file.
You are then asked if you want to send the MIME file:
- If you answer N (No), this part of the utility ends.
You would be able to send this MIME file later, through command
mmail/sndmime
- If you answer Y (Yes), you would run the sndmime command
right away, see next.
6.Sending the MIME file
You must fill in your name and your e-mail address:
Figure 8- Fill in the sender's data
then you must specify whom the mail-message should be sent to:
Figure 9- Must specify destinations
We press F6 to select some groups (distribution lists):
Figure 10- Selecting groups (distribution lists)
Please note the type of distributions:
- 1 = To
- 2 = cc (carbon copy)
- 3 = bc (blank copy)
Figure 11- Addressees so far
You may also press F7 to select individuals from the Address Book:
Figure 12- Selecting individuals from the Address Book
Figure 13- Addressees so far
When you are finished adding groups and individuals to mail-message
distribution, press F10 to send the MIME file.
If you addressed your MIME file to some Groups,
you will receive the following screen:
Figure 14- Collapse / expand Groups
- Select collapse not to expand groups.
In this way you would not let the recipients know the names
and the e-mail addresses of the other recipientes.
This is a good rule to prevent spammimg.
- Select expand to have all names and
addresses from groups displayed to the receivers.
Some of the receivers may not like it.
After this, your e-mail is being sent.
7.Send yourself some MIME files
Why don't you try to send some MIME files to your e-mail address?
This will provide you some evidence of what you can achieve.
Just press this
 button. button.
8.Some considerations
- Not a mail tool, just a prototype
This utility, made of commands like
wrkaddr, wrkgrp, crtmime, sndmime.
The ILE-RPG programs invoked by these commands use very powerful commands and procedures
documented in pages Main utilities and Service program.
By using those commands and procedures in your ILE programs you can rather easily automate your IBM i e-mailing processes.
- Text/plain or Text/Html?
Text/Html provides a far better message representation than Text/plain. It however requires some HTML knowledge.
If you use just Text/plain (or Text/source-member), some MMAIL procedures create in the mail-message two versions of the text:
one in text/plain and one in text/html. Usually mailers present the text/html version of the text, which looks better.
Of course, this converted text/html version does not provide different fonts and colors, as you would obtain with a true text/html of yours.
- Embedding and attaching.
This utilty allows for embedding a single text item into the mail-message body. All other items are attached. Binary stream files are attached in Base64 format.
Appendix A - Special support for database files,
source members, and spool files
In order to allow for embedding / attaching database files, source members,
and spool files, three fictitious "content-types" are provided through
command mmail/crtmime:
- text/source-member
- text/spool
- text/database-file
Content-type text/source-member
By selecting this content-type you will receive a special window
that allows to import a source member (the source member will be copied to an
IFS stream file). Source member text can be embedded in the body or attached.
Content-type text/spool
By selecting this content-type you will receive a special window
that allows to import a spool file (the spool file will be copied to an
IFS stream file). The generated text is attached to the mail-message and
is assigned is assigned content-type text/plain.
Note.
You may ask a spool file to be converted to PDF
(please check the prerequisites).
Spool files converted to PDF's are added as attachments in Base64 format.
Content-type text/database-file
By selecting this content-type you will receive a special window
that allows to import a database file member.
The database file member is copied to a source file member, then
the source file member is copied to a stream file.
The resulting text is attached to the mail-message and is assigned the content-type text/plain.
Note.
Only the initial 2,000 bytes of each record
are taken. Non-character data are taken "as is".
|