This page is about the old original file upload program dated year 2003 and named fupload.
Though this program has been outmoded by the Ron Egyed's fupload2 program,
I believe that some documentation should be kept, at least for the former users, who may still have it.
The major restriction in this program is that you cannot upload files larger than 16 Mb.
Also program customization is rather difficult.
1. Using the FUPLOAD program
- If you installed the Original HTTP directives to run FUPLOAD, enter the following in the location line of your browser:
http://yourTcpAddr/fuploadp/fupload.pgm
- If you installed the Apache HTTP directives to run FUPLOAD, enter the following in the location line of your browser:
http://yourTcpAddr:8027/fuploadp/fupload.pgm
The following shows up:
 |
|
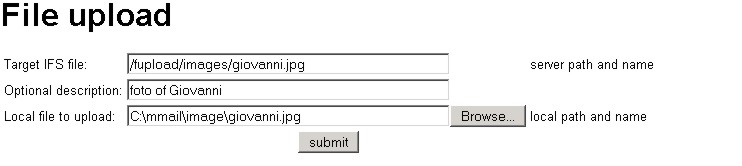
| | Figure 1- FUPLOAD initial screen |
- Enter the target IFS file
- Optionally enter some description
- Use the browse button to select from the PC the file to be uploaded
- Press the submit button
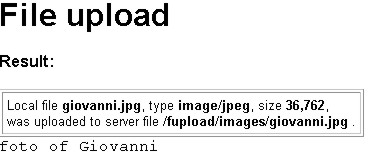
The followin screen is then displayed:
|
|
| | Figure 2- FUPLOAD file uploaded |
2. Tailoring program FUPLOAD to your needs
You should develop your file upload program in a library of yours (never create objects in library FUPLOAD).
Some experience with ILE-RPG and cgidev2
WEB programming is required.
Open a separate window
to display the ILE-RPG source of the upload CGI
fupload.
To better understand how the program works
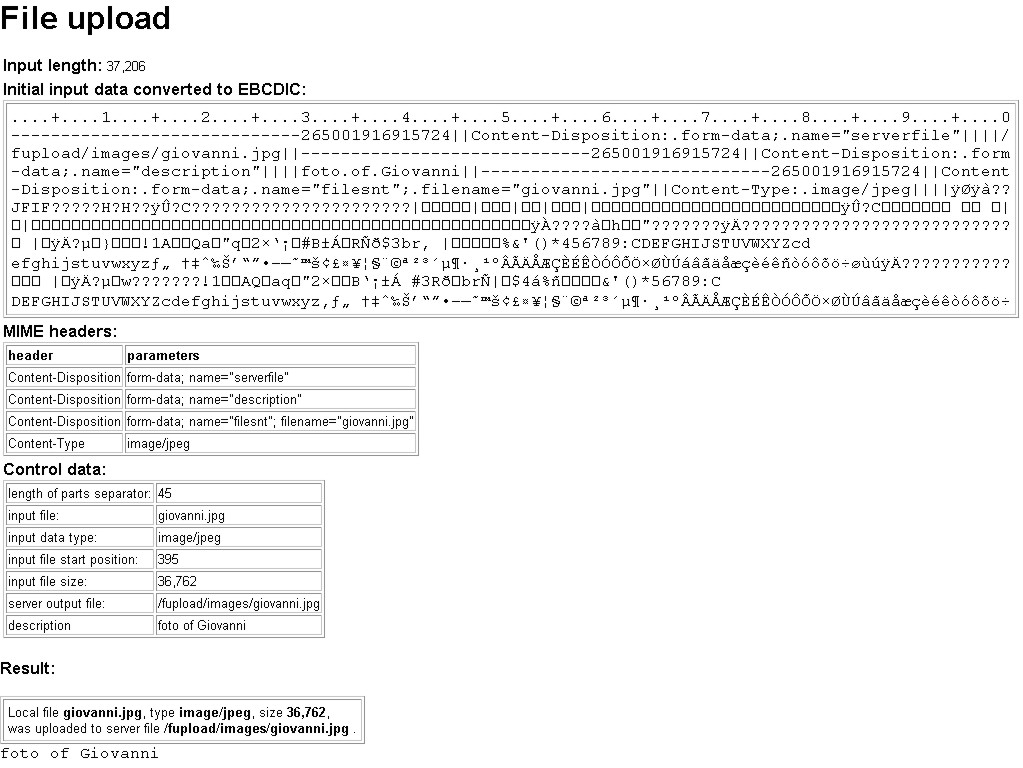
- set variable DetailSW to a non blank value:
29.00 D DetailSW s 1a inz('x') |
- recreate the program via command
upload/compile
Now, when you run it, the HTML response shows some detail
information used by the program to perform the operation. See
figure 5.
Some comments on program execution.
It goes through the following steps:
- Retrieves the length of the input buffer.
If length is zero, it issues the page asking for input data.
If length not zero, it should process the upload request.
We shall deal with this case (PART 2).
- Allocates an amount of storage equal to the length
of the input buffer
- Calls the "standard input" API to receive the input buffer
in the allocated storage
- Converts a maximum of 1,000 initial input ASCII characters
to EBCDIC. This is important, as the control parameters
are expected in the first 1,000 initial characters
(this is why the file to be uploaded was the last input
field in the form used to launch the upload request)
- If requested so by the DetailSW,
it displays some data (the first 1,000 chars
and the MIME headers falling in this string) in the
response HTML page.
- Retrieves all the parameters which are needed for the
upload. This is a very important part, that you
must customize any time you need to add or change input
parameters. The following parameters are retrieved:
- Path and name of the local file ("FileName").
This will just be reported in the HTML response page.
- Type of the local file ("FileType").
This will just be reported in the HTML response page.
- Start position (in the buffer) of the local file to be uploaded
("StrPos").
This is a vital piece of information.
- Size of the local file to be uploaded
("FileSize").
This is a vital piece of information.
- Path and name of the server IFS file to be created
("ServerFile").
This is a vital piece of information.
- Description
("Description").
This parameter is just provided to teach how to handle
parameters added for program customization.
- Makes sure that the target directory ("ServerDir", the IFS directory
where the local file should be uploaded) exists
- Performs the upload (routine "WrtDta").
This is done through the following steps:
- Delete the server file, if already existing
- Open the server file for output
- Write to the file the string in the input buffer
containing the local file to be uploaded
- Close the server file
- Report the outcome of the operation in the response HTML page.
|