In May 2009, Ron Egyed, RJE Consulting Inc, New Port Richey (FL), U.S., made available to me a new upload program,
called FUPLOAD2,
that by far exceeds the original FUPLOAD program.
In fact FUPLOAD2
- allows to upload in a single shot several PC files
- has no restrictions as to the file sizes
- shows greater performance
- can be easily copied and tailored to support specific needs
The great easiness of FUPLOAD2 comes from the fact that Ron included the files upload
in the zhbGetInput() subprocedure of service program CGIDEV2/CGISRVPGM2.
(see this page).
The upload takes place when a
content-type multipart/form-data is met.
Library FUPLOAD includes service program FUPSRVPGM2 - duplicated from service program CGIDEV2/CGISRVPGM2 - and that makes available Ron's oustanding support.
1. Using the FUPLOAD2 program
- Invoking the fupload2 program
- If you installed the Apache HTTP directives to run the FUPLOAD utilities, enter the following in the location line of your browser:
http://yourTcpAddr:8027/fuploadp/fupload2.pgm
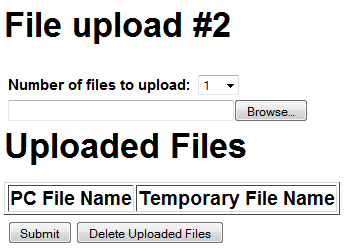
The following shows up:
 |
|
| | Figure 1- FUPLOAD2 initial screen |
- Number of files to be uploaded
Up to 10 files can be upladed in a single shot.
If you need to upload more than one file in asignle shot, select the number of files to be uploaded from the selection list and press the Submit button.
This creates the requested number of Browse... input lines.
- Selecting the files to be uploaded
Press the Browse... button to select from the PC the file to be uploaded.
- Uploading the files
Press the Submit button to upload the files.
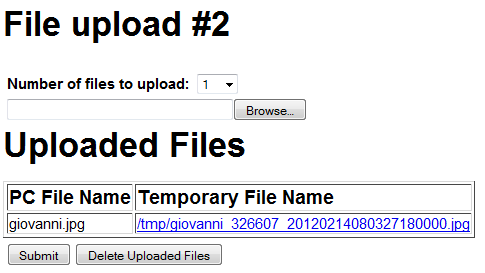
The uploaded files are then listed:
|
|
| | Figure 2- File uploaded by FUPLOAD2 |
Note 1 - If you upload more files, the are added to the list of the uploaded files.
Note 2 - The files are always uploaded to IFS directory /tmp.
If you need a file be renamed and / or moved to another directory you must do this by yourself.
Note 3 - The name of the uploaded file is added two cahacter strings: the joblog number of the HTTP job performing the upload,
and a timestamp.
Note 4 - To delete all the uploaded files, press the button Delete Uploaded Files.
2. Uploading files with your own program
You may use the FUPLOAD2 tecnique to upload files through your own CGI.
Do the following:
- Develop your program in a library of yours (never develop object in library FUPLOAD).
- Use as a base the FUPLOAD2 external HTML (copy it from stream file /fupload/html/fupload2.txt)
and the FUPLOAD2 RPG source (copy if from member FUPLOAD2 in FUPLOAD/QRPGLESRC).
- Modify the external HTML and the RPG code according to your needs.
- Make sure to bind to service program FUPLOAD/CGISRVPGM2 when creating the program.
- Something is worth to be noted about the input variables to the program:
- Regular input variables such as the ones defined in a form via
- <input type=hidden ...>
- <input type=text ...>
- <input type=radio ...>
- <input type=checkbox ...>
- <select ...>
- <textarea ...>
- etc. ...
can be received in the usual way via subprocedure zhbGetvar....
- Input variables <:input type=file ... >
are processed by subprocedure zhbGetinput() which cares for uploading the files.
For each file uploaded, zhbGetinput() provides two input variables that your program may receive through zhbGetvar...:
- browserfile: the name of the file uploaded, as it was in the PC
- browserfile_tempfile: the name of the file uploaded, as it was set on the iSeries
Your program may then use the value of variable browserfile_tempfile to rename or to move an uploaded file.
3. Validating file upload requests
Though the ability to upload files sounds great, there might be a need to restrict it to some users or to some file types (extensions).
There are two ways to perform such a validation:
In principles, this is the best approach, as the validation process takes place on the client and is immediate.
What you need is some JavaScript function validating the name of the file to be uploaded.
This Javascript function must then be made available in the external HTML of your upload program.
The only validation that makes sense on the client side is the validation of the extension of the file to be uploaded.
As an example, the external HTML's of CGI programs UPLOAD2 and UPLOAD3 contain a JavaScript validation function
named ValidateExtension(). This function works on two important variables:
- a constant (possible values 'yes' or 'no') telling whether extension validation should take place
- an array of the allowed extensions
Variables a) and b) should be customized according to the installation needs.
However, as this may be an hazard, a special command - FUPLOAD/UPDALWEXT - has been developed to customize these variables,
which are then set in their scripts from programs UPLOAD2 and UPLOAD3 as output variables.
A file upload goes through two stages:
- The PC file is trasmitted to the server along with any other input field. This is done by the HTTP server.
- The application program (the CGI program) takes care of receiving the input variables and the input file(s).
This occurs when CGIDEV2/CGISRVPGM2 subprocedure ZhbGetInput() is invoked.
Usually ZhbGetInput() would copy the input file(s) to IFS stream file(s) in directory /tmp.
However, before creating the IFS stream file, subprocedure ZhbGetInput() checks whether an Exit Point Validation User Program
is available and, if so, asks it to validate the file.
- If the validation is successful, the PC file is uploaded to an IFS stream file.
- If the validation fails, no IFS stream file is created, the name of the file is changed to
*** NOT VALIDATED ***
and an error message is written to the CGIDEBUG file.
What you could then do is to write such a Validation User Program and make it available for the appropriate Exit Point.
This is how you do it:
- The validation program receives two parameters, the qualified name (path, file name and extension) of the IFS stream file to be created and a return code:
D UPLOADVAL       pr
D  filename                   1024    varying
D  retcode                      10i 0
D UPLOADVAL       pi
D  filename                   1024    varying
D retcode 10i 0 |
- A value 0 (zero) of the return code means that the PC file passed the validation,
a value -1 means that the validation was not passed (failed).
- Most sensitive items for validation are the file extension and the user name
(the user name, to be available, requires user validation through the appropriate HTTP directives).
- The validation program could as well return a different qualified name for the IFS stream file to be created.
- As an example, you could look at program FUPLOAD/UPLOADVAL,
press here to display its source.
Please note that this validation program accepts only files with extension csv.
- Run command FUPLOAD/UPDEXITP. The following screen appears:
                 Update Exit Points

Type option, press Enter.
  2=Change

  Exit point               User program
  FILE-UPLOAD-001


F3=End |
- Type 2 in front of the FILE-UPLOAD-001 exit point name to receive the following screen:
                 Update Exit Points

 Exit point . . . . . . . . FILE-UPLOAD-001
 User program . . . . . . .
   Library  . . . . . . . .

F3=End F12=Cancel |
Then type the name and the library name of your upload validation program.
Just as an example you could specify program FUPLOAD/UPLOADVAL.
We suggest to create your own file upload validation program in some library of yours.
Never change FUPLOAD programs, nor develop objects in library FUPLOAD:
when installing the next FUPLOAD release your changes would disappear.
|